A Custom Domain is essential for enhancing online presence by using a personalized domain name that reflects the brand. It boosts visibility, professionalism, and trust, making it easier for visitors to find the site. Integration with other online assets helps in brand recognition across platforms, ultimately driving online success.
There are 2 easy steps to connecting your custom domain to your deck:
Step 1: Your Decktopus configurations
Step 2: Your own DNS configurations
Step 3: Check the status of the setup & configure the link further
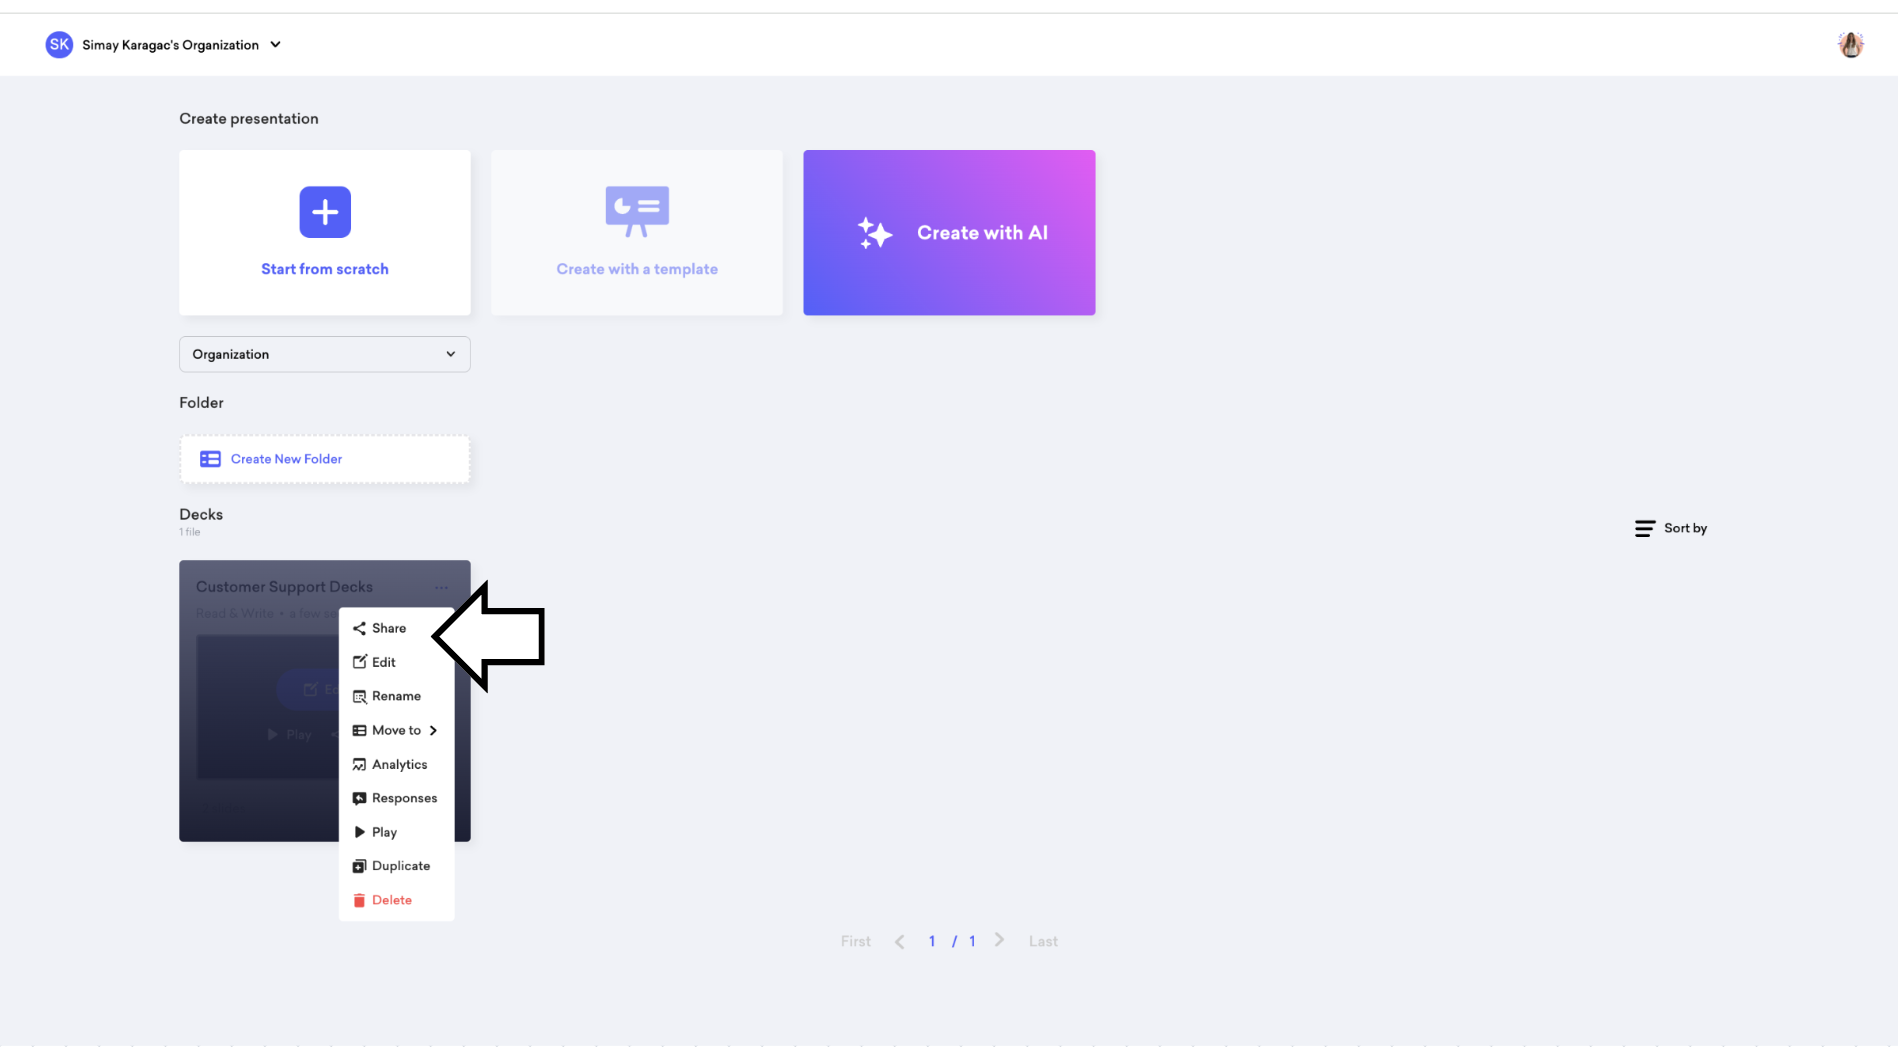
Go to your dashboard
Click the three dots on the deck's preview and "Share" button of the deck that you want to connect your custom domain:
Or alternatively, click the "Edit" button of the deck on the dashboard and then click the "Share" button on the header.
Click the “Connect Your Custom Domain”.
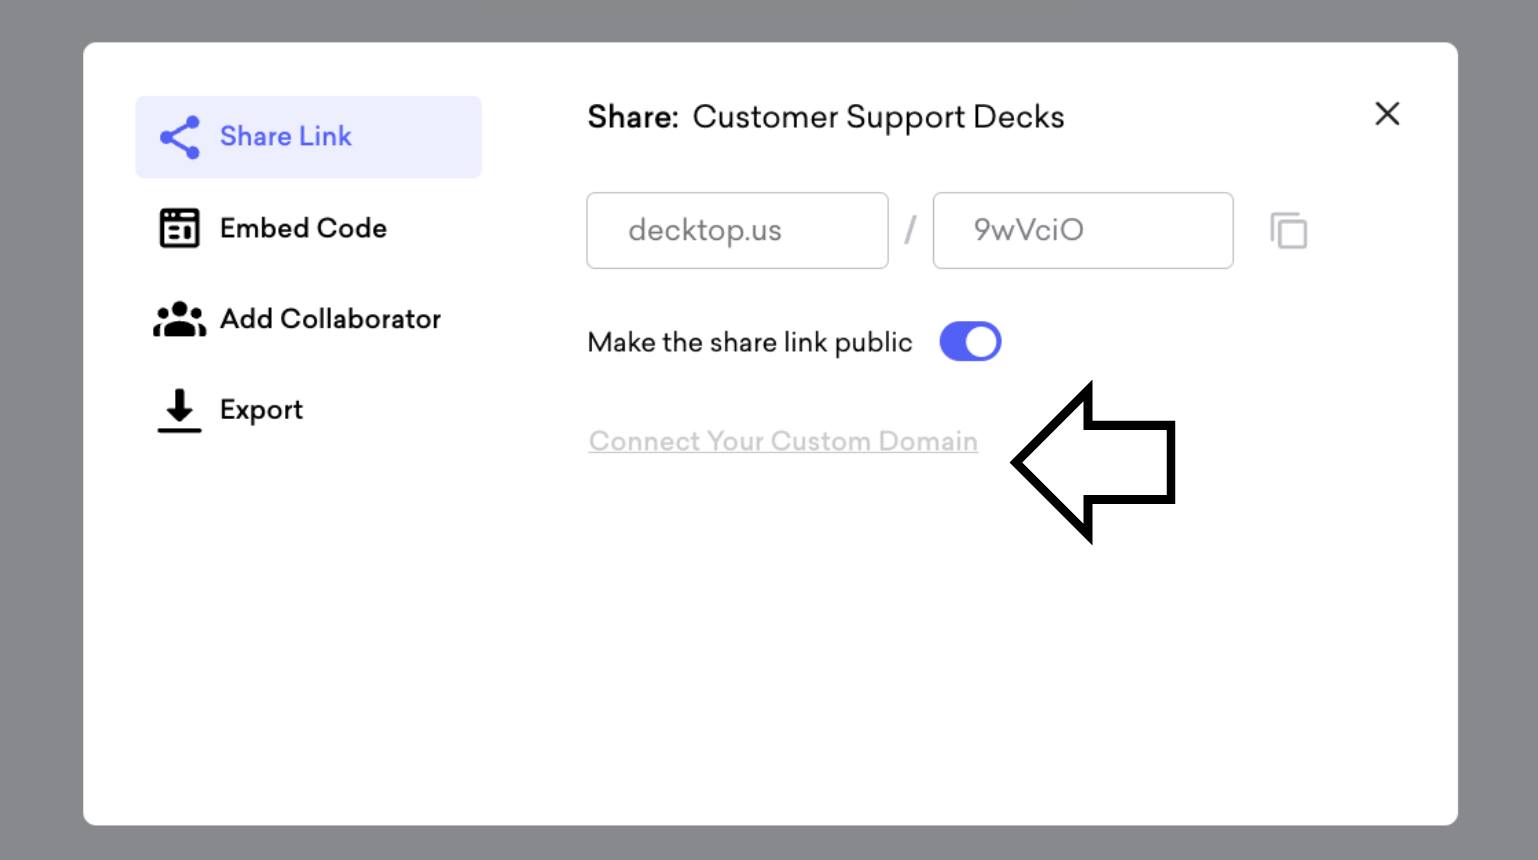
Figure 2: The sharing modal
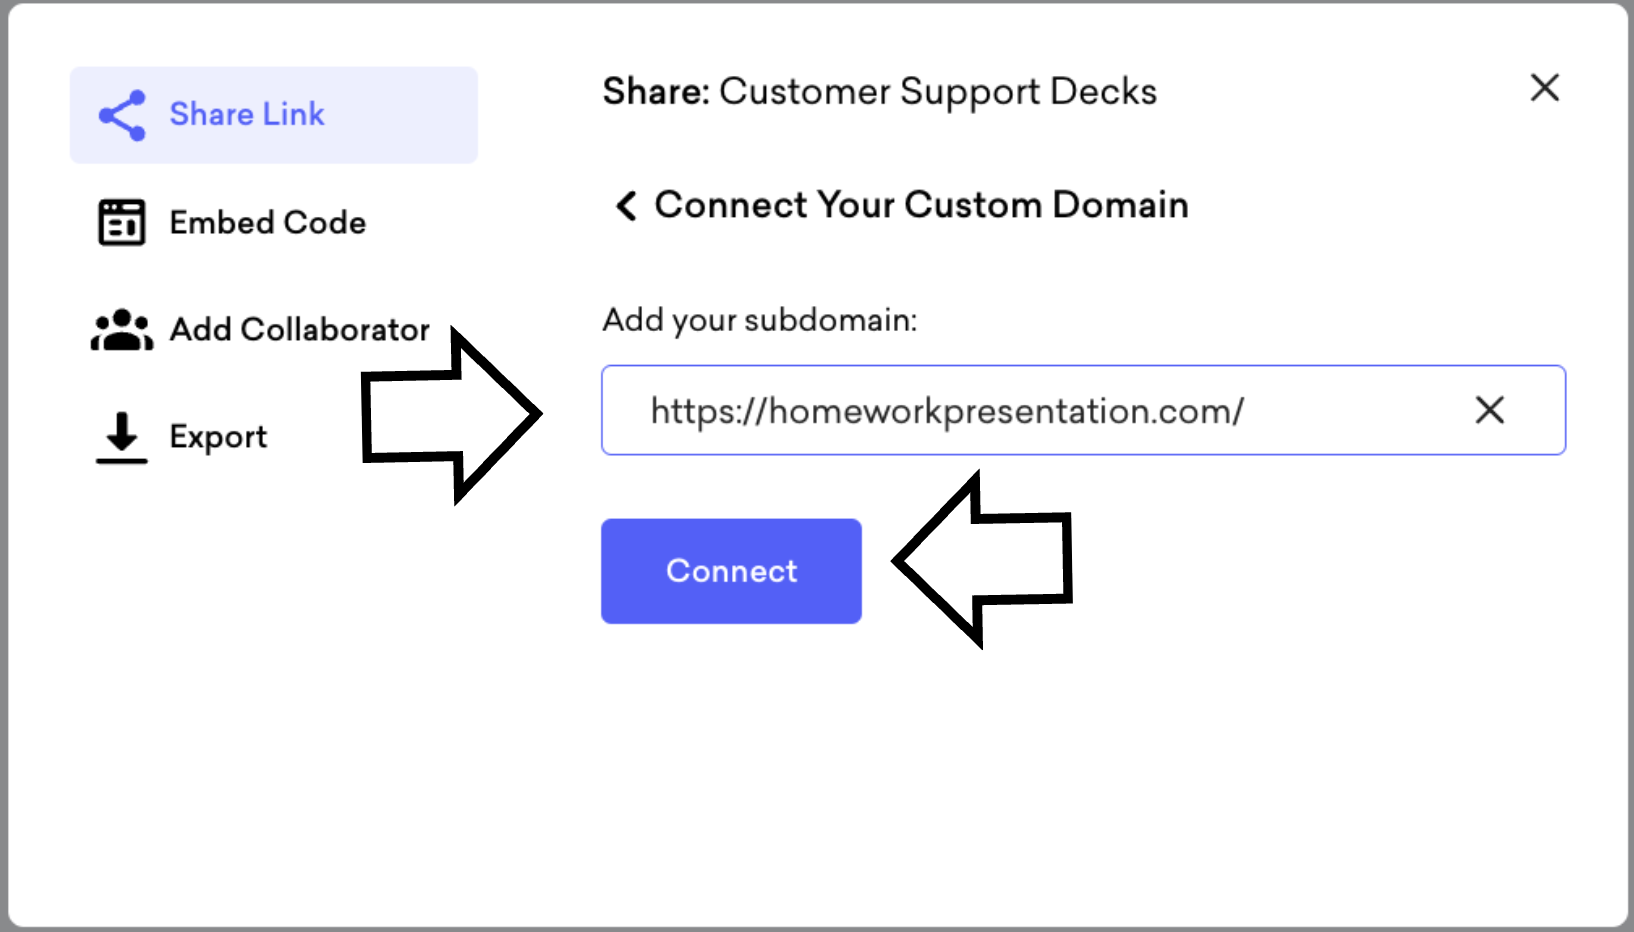
Type a subdomain and then click the "Continue"
Please read here carefully:
The subdomain is a domain under your main domain. For example;
If your main domain is: mywebsite.com,
then your subdomain might be something like this: presentation.mywebsite.com
The first part of the subdomain can be anything you want, the most popular ones are presentations, proposals, quizzes, decks, info, and so on, it's all up to you.
Recognize that the remaining part is the same as the main domain (as mywebsite.com in the example)
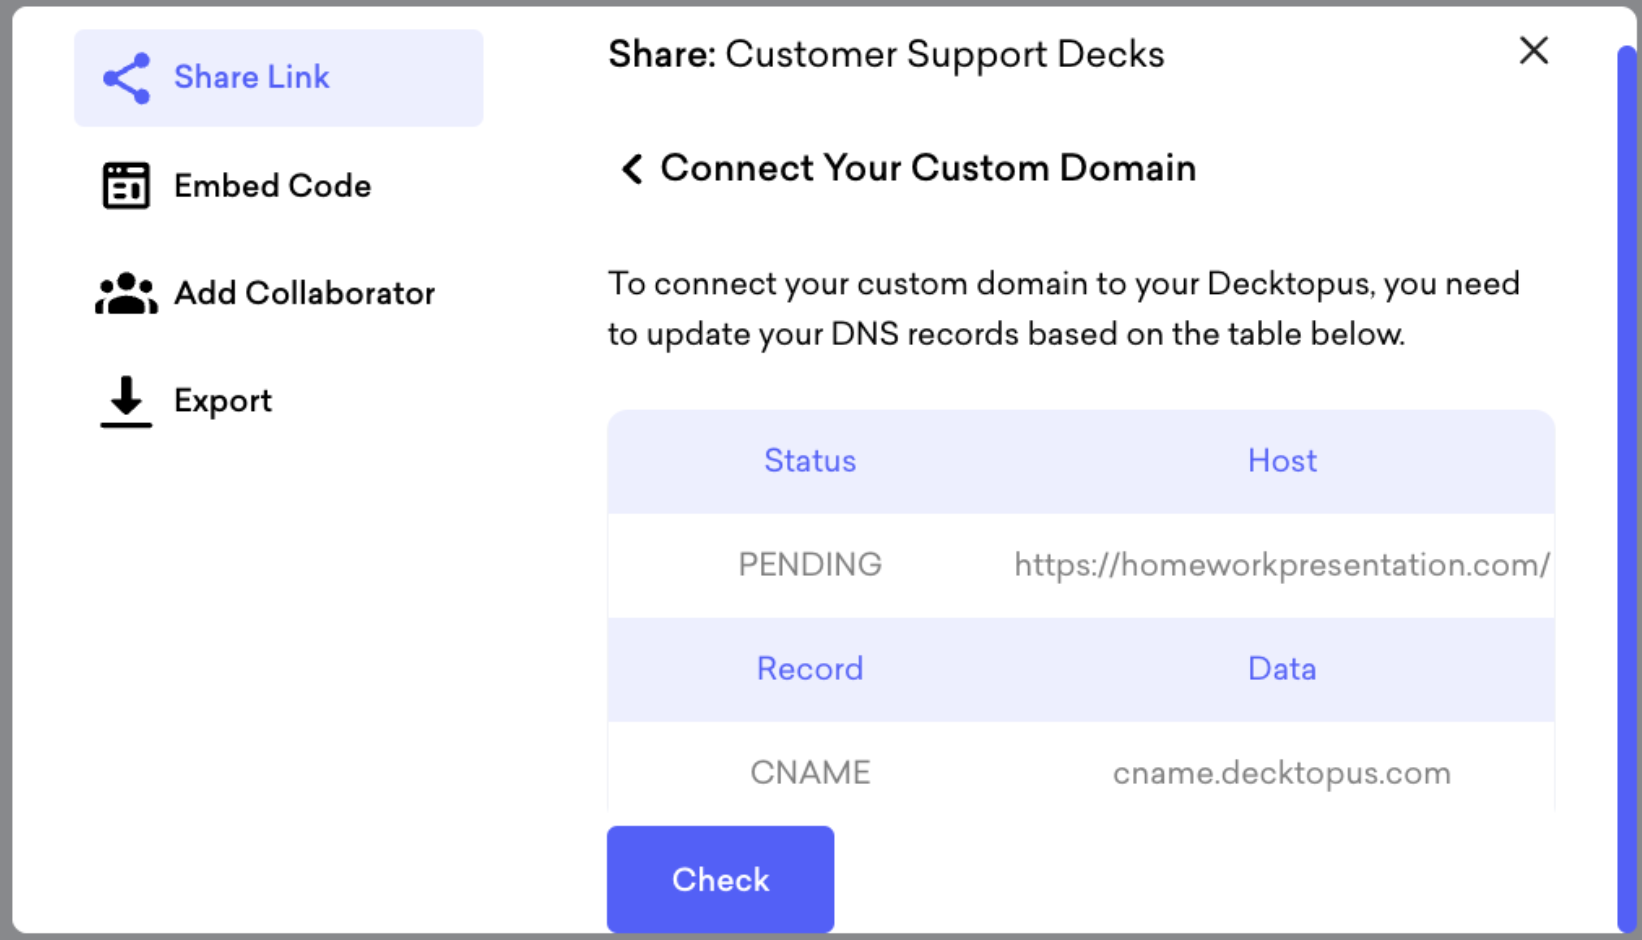
After adding the subdomain, you'll see a table. Don't close this window. We'll use the HOST (presentation.mywebsite.com in this example) and the DATA (cname.decktopus.com) values in the next step.
Go to your DNS settings.
You should add a CNAME record in the DNS settings of your own domain server.
Make sure you are on the CNAME tab and adding a "CNAME" (Not A, AAA, MX, TXT, NS, SRV, CAA...) as illustrated in Figure 5.
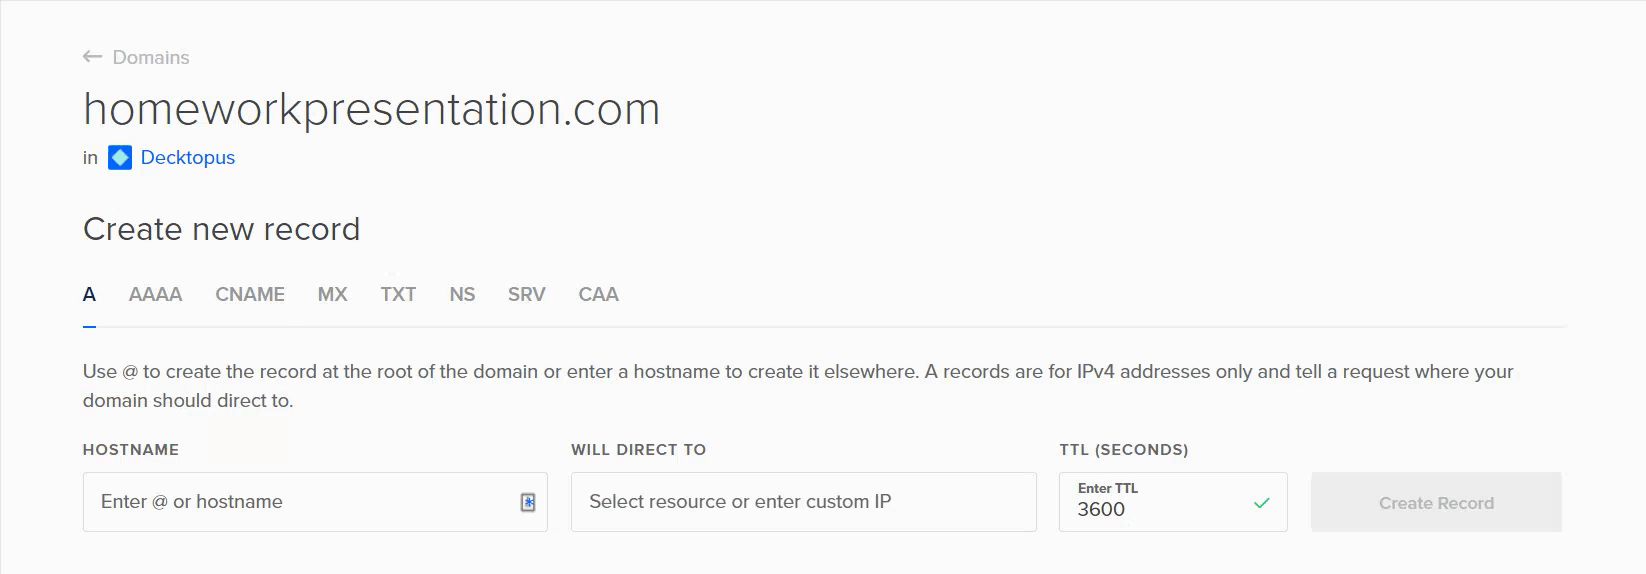
DNS settings on your domain provider
After that, you should add presentation.mywebsite.com part as HOSTNAME and cname.decktopus.com part as DATA (or alias). Make the TTL duration as minimum as possible. (Most of the DNS providers accept a minimum of 600).
After creating the CNAME record, you need to wait for the servers to process the data. Although this process is usually activated immediately, it may take up to 72 hours due to some domain servers. This process is independent of Decktopus.
Turn back to your Decktopus window.
Click the "Check" button. (See Figure 6)
After clicking "Check," if Decktopus gives you an error, there are 2 possible reasons:
1. Your domain is not ready yet. In order to understand it, go to https://dnschecker.org/#CNAME/ type your subdomain (presentation.mywebsite.com in the example), and click "Search" (make sure that the CNAME is selected). If you see a red "X" on the map or table, it means that the domain is not ready.
2. If you see everything green but are still getting errors on the Decktopus, then contact us (use the blue box on the right bottom).
Copy and share your link, and let the fun begin with Decktopus!
Click here to log in to Decktopus